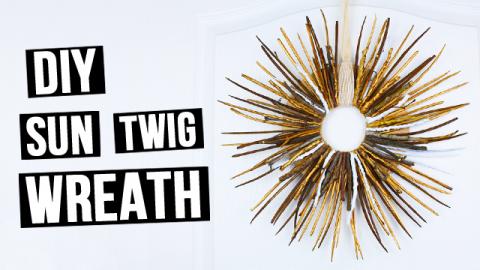
DIY Twig Wreath Tutorial
How to make DIY twig wreath. In this tutorial we're going to show you one more wreath idea to decorate your home. This chic and rustic natural DIY twig wreath will make a fancy home embellishment!
Check out the video above to learn how to make your own!
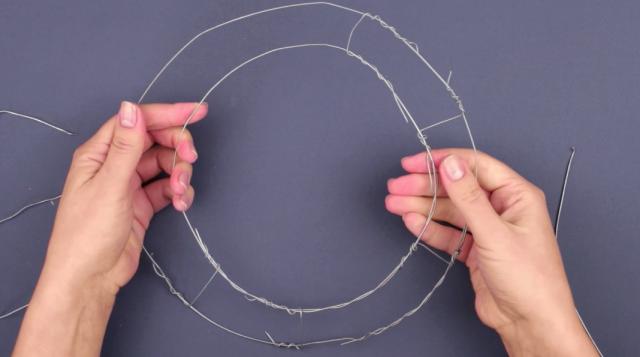
We’re going to make a two ring wreath base. Just form two wire rings and put them one into another.
Bend the wire to form a 8 inches diameter circle. Fix the ends of the wire around the base cord .
Shape the outer ring around the smaller one leaving 1-2 inches in between. Fix. Shape the ring.
We’ll need some 4-6 inches pieces of wire two secure the rings together.
Run the piece of wire under the frame rings. ..Bend one end around the outer ring…. Mind your fingers…the other end fix to the inner ring.
Repeat the same steps with other wire snippets.
Shape the circle as you go.
Fix the crossbars every 2-4 inches. They are to hold the shape of the frame. Also, we’ll secure the twigs onto the crossbars.
Crimp the sticking wire ends with pliers. Bend slightly.
You want to form a kind of a gutter – the birch twigs will naturally curve in and the wreath won’t look flat.
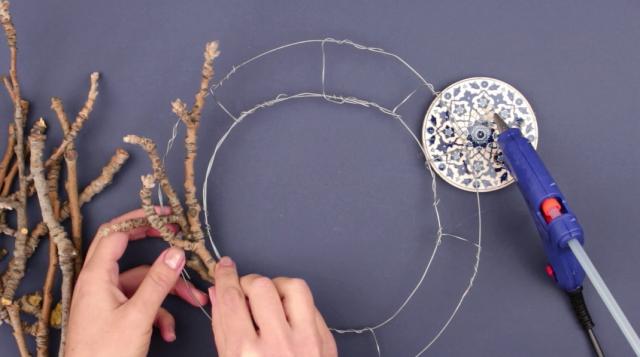
Arrange the twigs. First the poplar ones. They have rustic bold texture that will make a base of the twig wreath.
Lay the twigs so that they slightly overlap. Move in a spiral manner.
We’ll use hot glue gun to fix the twigs.
Dab some glue onto the crossbar. Aattach the twig at a slight angle.
Lay the next one. Move in spiral.
Press the twig for a few seconds till the glue cools down.
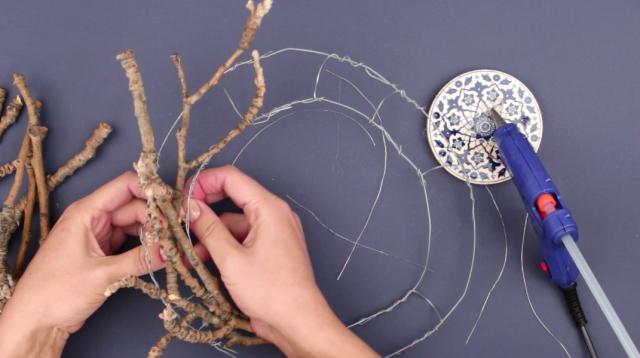
Take some snippets of craft wire.
Bend some twigs together securing them to the frame.
Repeat the same steps as you continue with the twig arrangement.
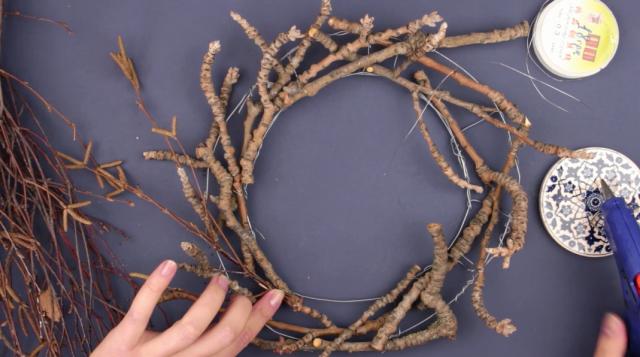
Now add some volume with birch twigs.
Make a bunch. Tie with craft wire. Hot glue. Another bunch.
Just like with poplar twigs, arrange the bunches in spiral.
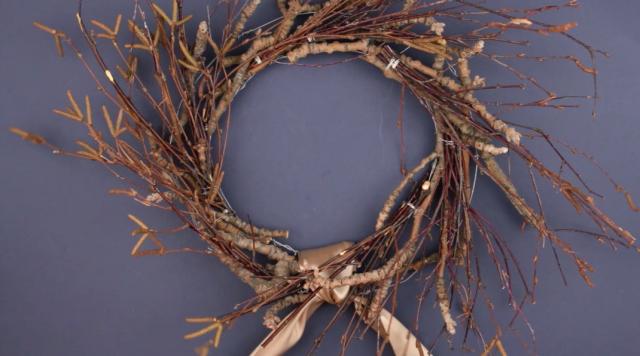
Tie a satin ribbon for a hanging loop.
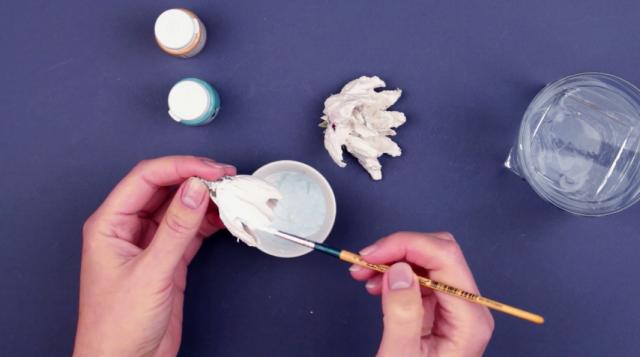
In one of our previous tutorials we showed how to make porcelain-look-alike flowers. We’ll add some floral finishing to the wreath
Tone the white paint with a drop of blue. We only want to give a hue.
Paintbrush the petals from outside and inside.
Let the paint dry out. Use a hairdryer if you feel impatient to proceed to the next stage.
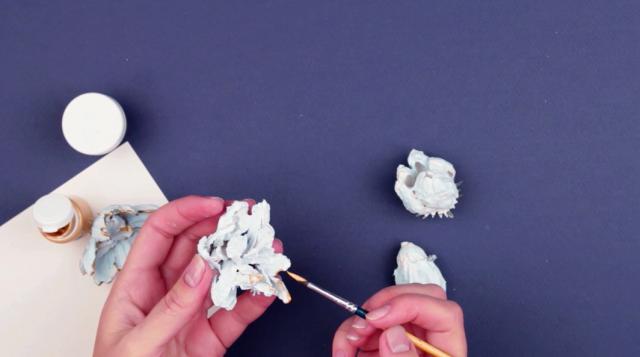
The paint has dried out. Rim the petals with gold.
Dip a narrow brush into a paint and run along the petal edges squeezing the paint out. You get a kind of relief rim.
The gold paint has dried out. The flowers look just like porcelain.
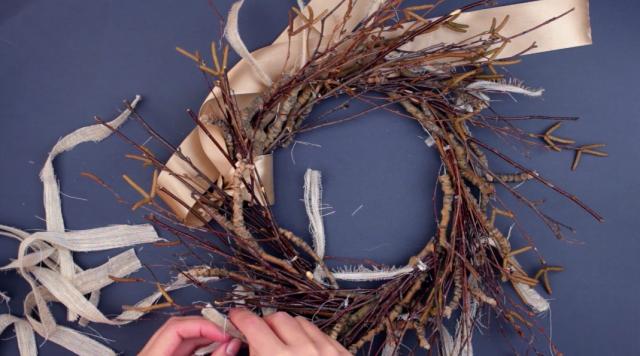
Now we have to decorate twig wreath with a burlap bow. It’s quite a big décor element. We’ll tie some strips of linen to the wreath for a balanced look.
To add texture to the wreath we’re going to tie the ribbons to the outer frame ring.

Now arrange the flowers. Find most favorable composition before fixing.
Again, move in spiral. Hot glue the flowers.
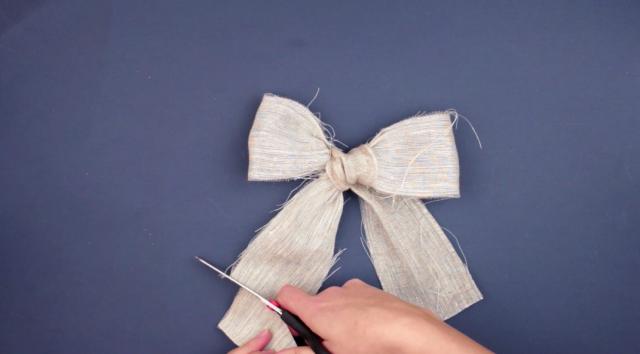
Now tie a bow. We’ve precut the strip around a meter long and 2-4 inches wide. Too large a bow will make the wreath look heavy.
Tie a bow. Shape the loops. Trim the ends.

Draw the ends of the bow behind the loops.
Hot glue the bow to the wreath.
The finishing touch.

This chic and rustic natural diy twig wreath will make a fancy home embellishment!
Materials we used for this project:
- twigs – here we have birch and poplar branches;
- 6,5 feet of steel wire;
- acrylic paints – of blue, turquoise and gold colours;
- some water;
- white acrylic base paint;
- hot glue;
- strips;
- ribbons.
If you're like this project, check out our YouTube channel: TroomTroom

