DIY Decorative Woven Paper Tray
How to make DIY woven paper tray. In our tutorial we’ll show how to make a cute decorative tray. This vintage tray with woven handles will perfectly decorate your kitchen or terrace interior!
Check out the video above to learn how to make your own!
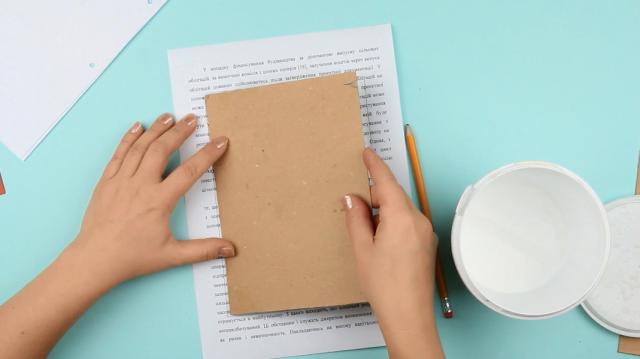
Mark off two 6x8 inches squares on thick cardstock. Cut them out.
Trace a square on an office paper sheet to mark a glue area.
Cover the paper with glue inside the margins. Attach the cardstock.
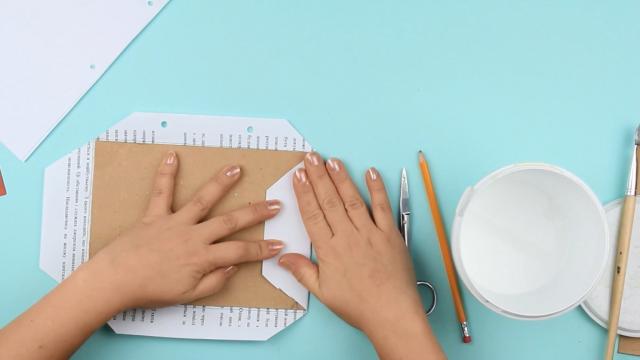
Cut out the corners. Add glue to the paper. Fold and press down.
Repeat for the second element. Press down until dry.
Mark off each across the perimeter.
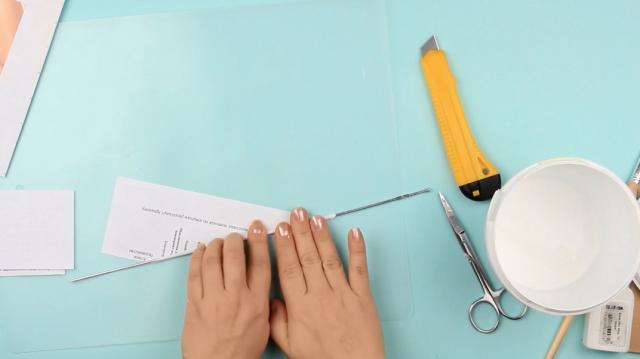
Prepare office paper tubes. We’ll need white glue, a craft knife and needle.
Cut out a piece of paper into 4 strips. Add a line of glue across the edge.
Roll a tube using a needle. Start with a corner.
Press the corner to keep in place. Remove the needle. Prepare 30 tubes.
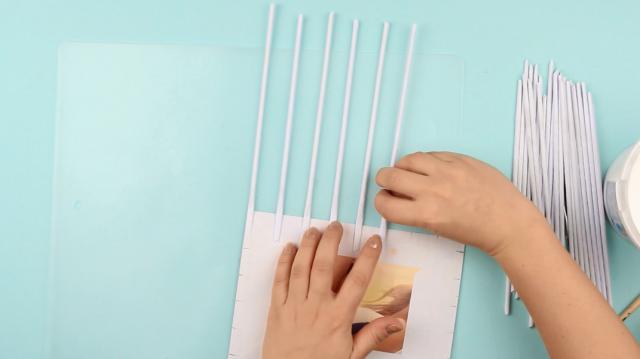
Flatten the sharp tube end and add the glue.
Attach the tubes to the marks across the perimeter and press well.
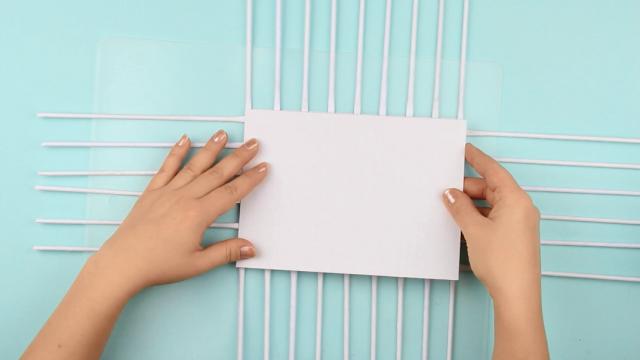
Cover the bottom with a smooth coat of glue.
Attach the other cardstock element. Press down for 4-6 hours.
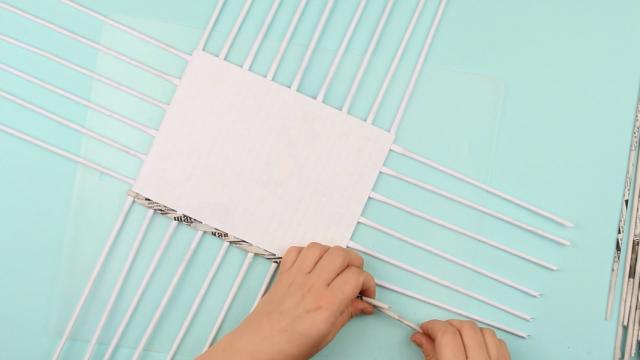
Now make newspaper tubes by cutting a folded spread into 8 parts. Prepare needed quantity and start weaving around the base.
Join two tubes together by putting one glued end into another.
Bend the long tube in half and weave around the frame starting with a corner.
Make the tubes longer as far as needed.
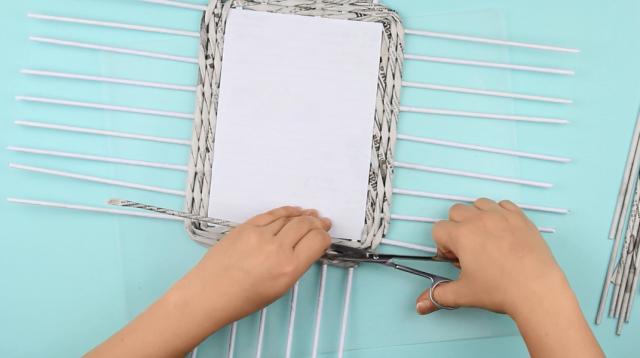
Continue weaving. At the end of the third layer secure, glue and cut the ends of the weaving tube.
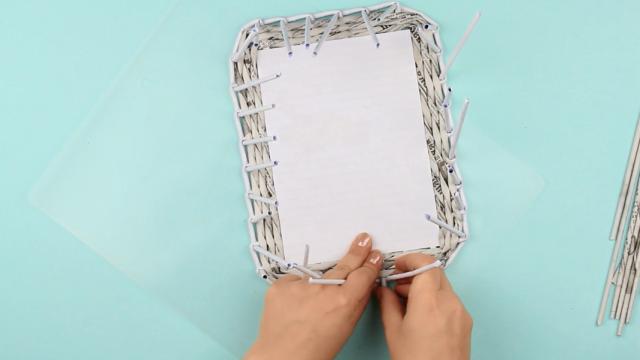
Wind a frame element around the next one and turn upright. Repeat for the others.
Pass the last tube through the loop and stick up.
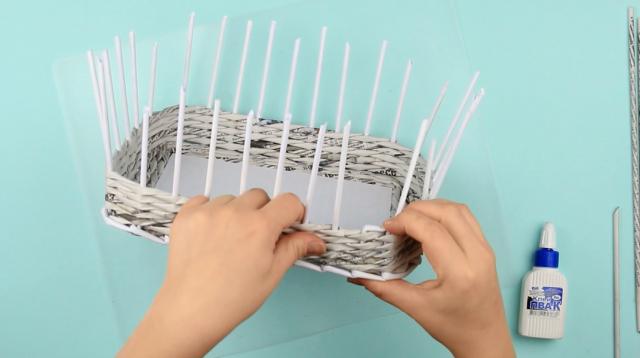
Weave the upright frame tubes around with a long one starting with a corner.
At the end of the forth layer secure, glue and cut out the ends of the weaving tube.
Bend a sticking tube to the next right one and downwards.
Cut out off the bend. Add some glue.
Tuck into the weaving from the edge.
Repeat for the other elements.
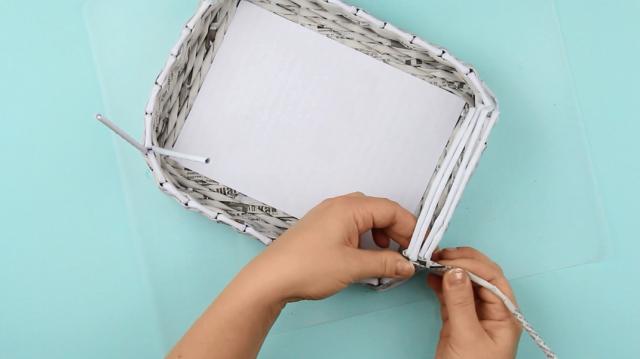
Make handles. Put in two pairs of glued office paper tubes into the short side corners.
Bend the tube pairs to form a square handle.
Leave off the bend and cut out the excess.
Add glue to the ends and tuck them into the weaving.
Wrap the handle tightly with a newspaper tube.
Then weave around each pair. Secure the tube end.
Repeat for the other handle.
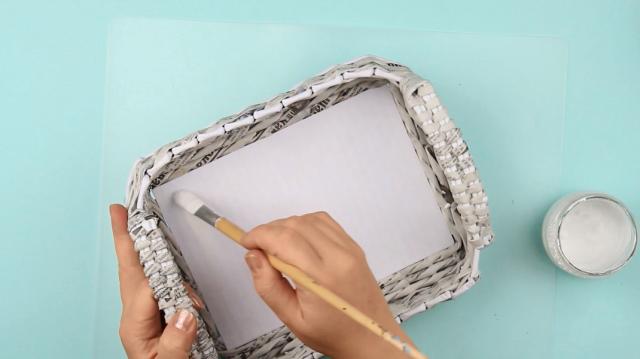
Let’s cover the tray with a ground coat. Mix white glue, water-based paint and water in equal proportion.
Coat with a brush starting inside.
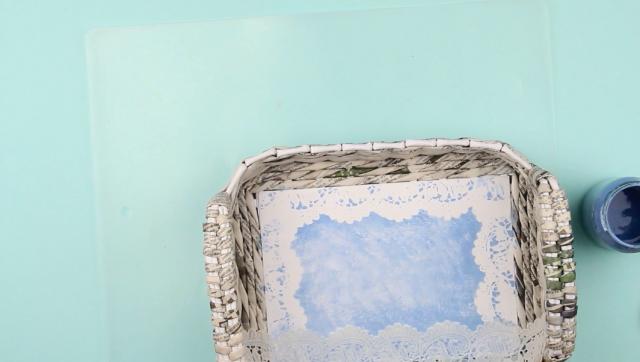
When the tray is dry, attach a lace stencil to the bottom. Use a tape.
Add blue gouache to the ground.
Touch the stencil with the blue paint using a sponge.
When dry, remove the stencil from the two opposite sides.
Add some paint to the corners.
Put off the rest stencils.
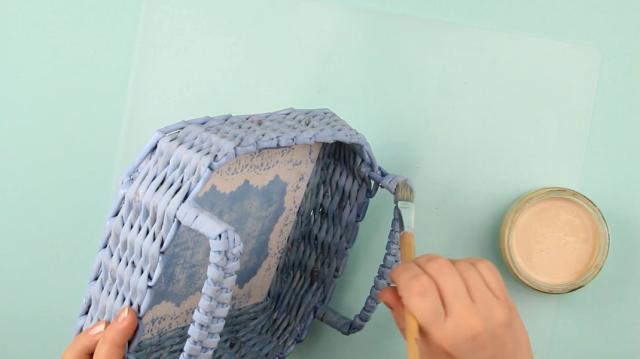
Now paint the tray leaving the cardstock parts untouched.
Apply two finishing coats to all sides. This will let us wash up the tray in lukewarm water without cleaners.
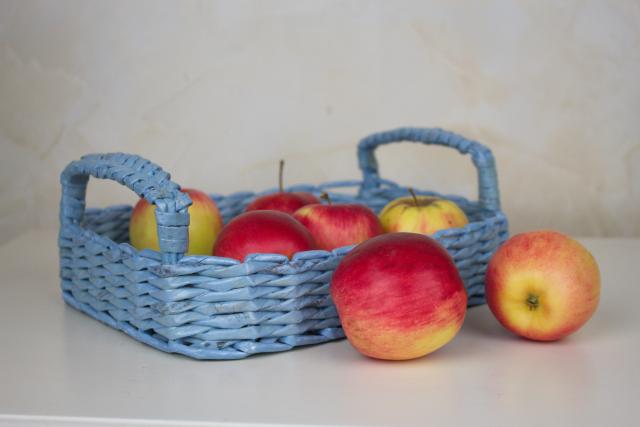
The convenient vintage tray with woven handles will perfectly decorate your kitchen or terrace interior.
Materials we used for this project:- protecting cover mat;
- newspapers;
- A4 cardstock – 2 pieces;
- office paper;
- knitting needle, size 4;
- craft knife;
- white glue;
- scissors;
- pencil;
- ruler;
- flat brush;
- water;
- water-based paint;
- blue gouache;
- lace stencil – 3 feet;
- transparent acrylic finish.
If you're like this project, check out our YouTube channel: TroomTroom
