7 DIY Summer Room Decor Ideas
In this video we'll share with you nice room decor ideas! We'll decorate the room in bright colors to feel the summer! With these easy DIY projects your room will become fun and colorful.
Check out the video above to learn how to make your own!
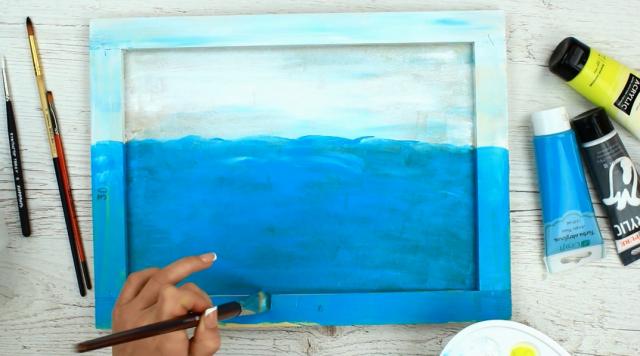
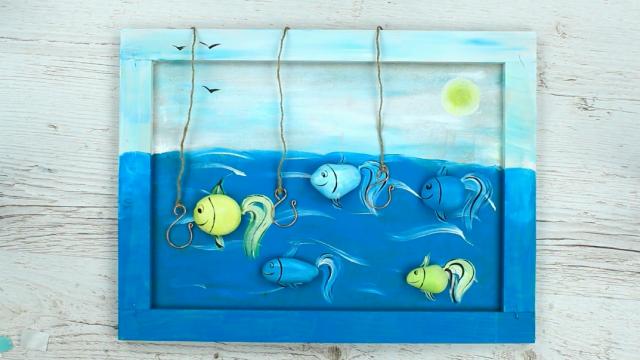
What about lovely little fish? Let’s make a marine wall decor with the cute creatures.
We’ll use summer colors – blue, white and yellow – to paint the sky, sea and sun.
Paint the top of the frame. Use white and blue to depict the sky. Paint the sea bright blue.
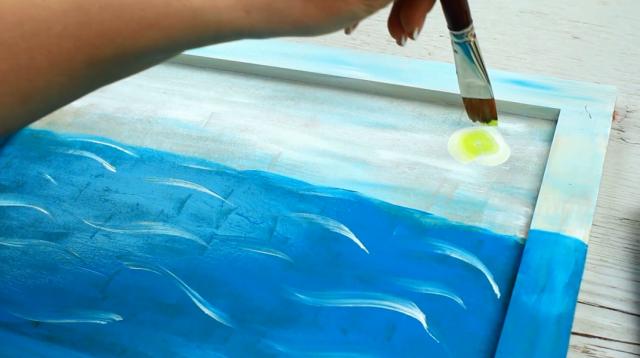
Add white foam to define waves.
Paint the sun in the right hand corner. Color the edges.
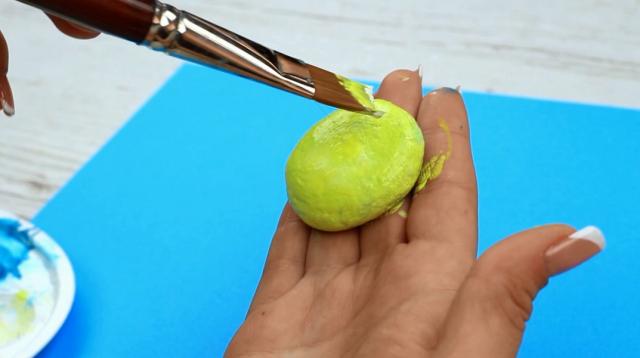
Turn the pebbles into fish. Choose the bright basic colors.
We’ve painted the stones yellow and various hues of blue.

Place them on the background to make the composition.

You can attach the pebbles with double-sided mounting tape.
It can be applied if the stone is flat.
Or you can use hot glue gun or multipurpose glue.
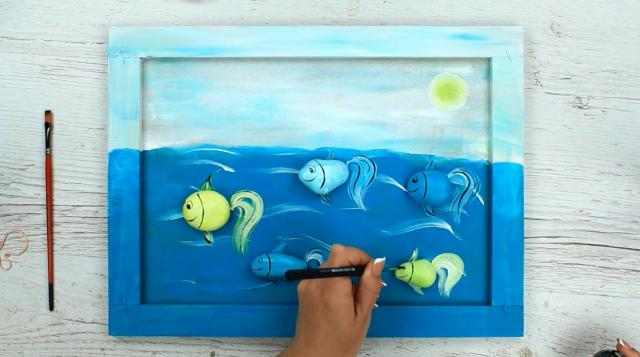
To finish pebble transformation into fish add some distinguished details. Paint tails and fins.
Define the head, eyes and mouth. Use a thin brush.
Add black shadows to the tails and fins.
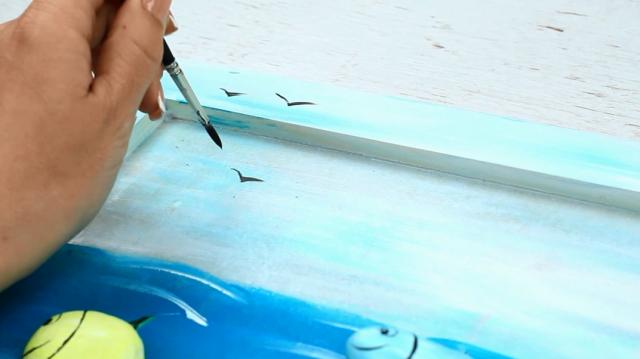
Paint a few birds flying in the sky.
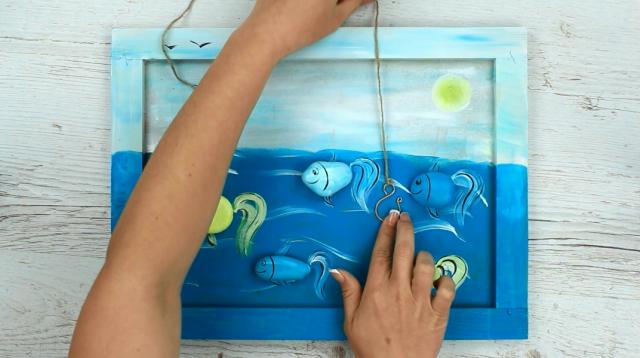
Add an invisible fisherman’s hook catching fish in the sea.
Tape it to the back.
Make a few hooks.

The cute wall decor with the lovely little fish can become a wall centerpiece. Besides it can be a perfect holder with its functional stones and hooks.
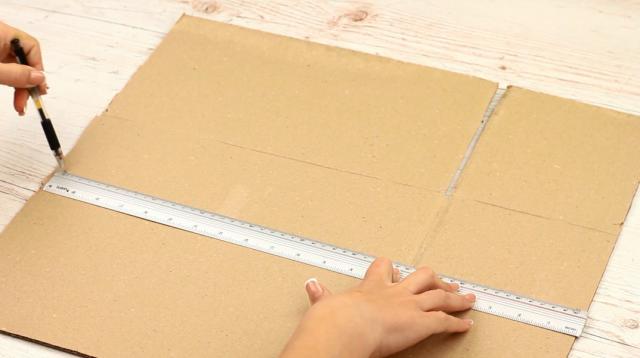
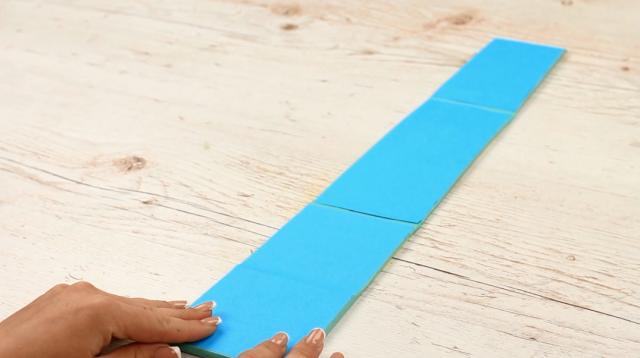
Let’s make a simple phone holder in summer colors.
Cut out a cardboard strip.
It should be about three times as long as your phone. Be careful to make it wider at one end.
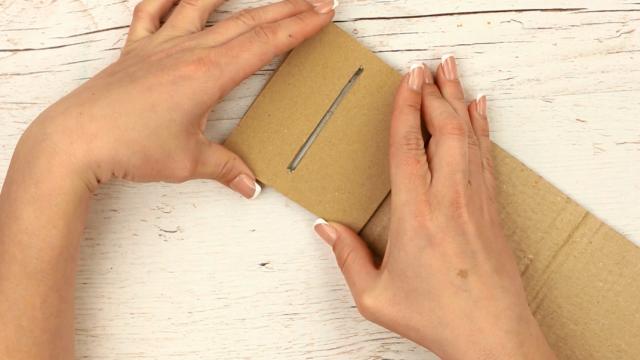
Measure out the thinner end. We’ve made it 3 inch wide.
Mark it off in the middle of the opposite side.
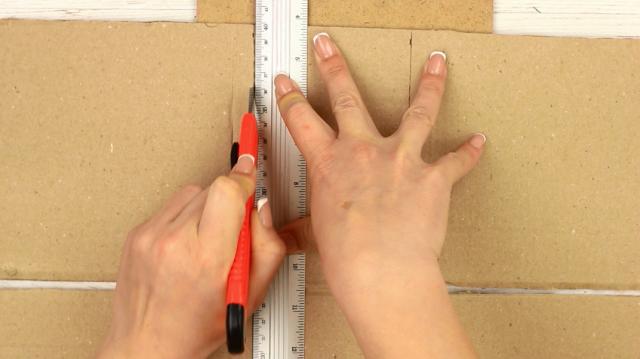
Cut out a slit ¼ inch wider.
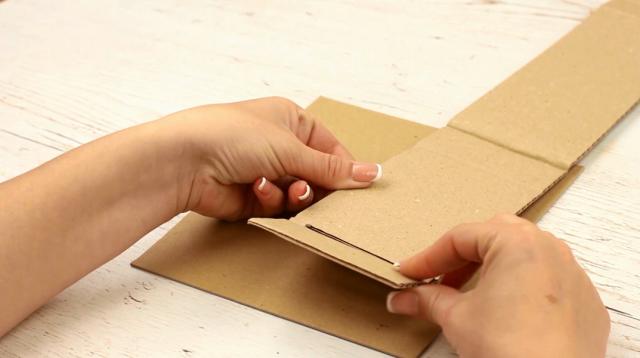
The side is easily bendable. We should fasten it.
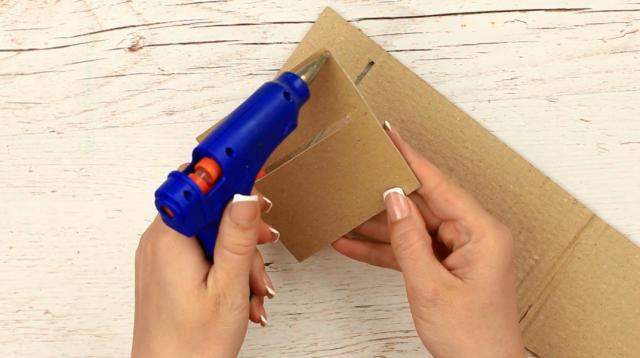
Make the same shaped cardboard detail. Trace it. And cut out.
Hot glue.
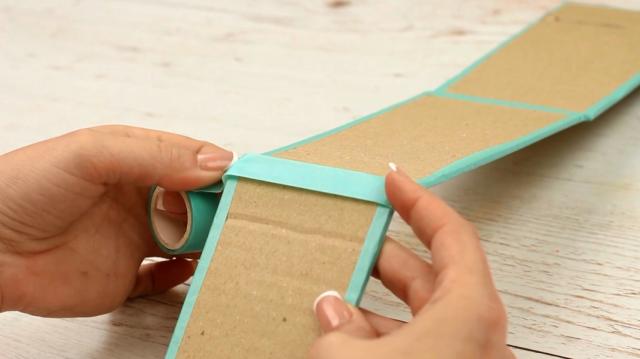
Tape the edges. Tape the bendy parts.
Cover the cardboard with the color paper. You can use white glue.
We’ve decorated each side with a different color. The sunny yellow and sky blue.
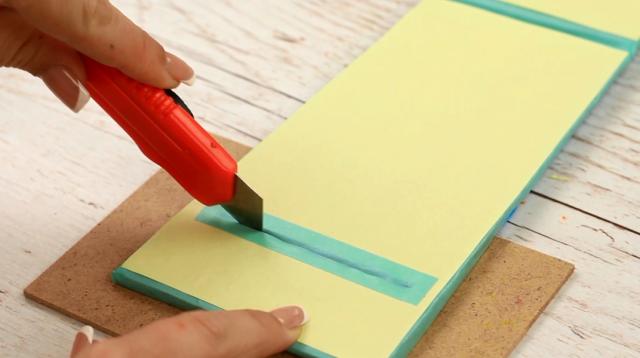
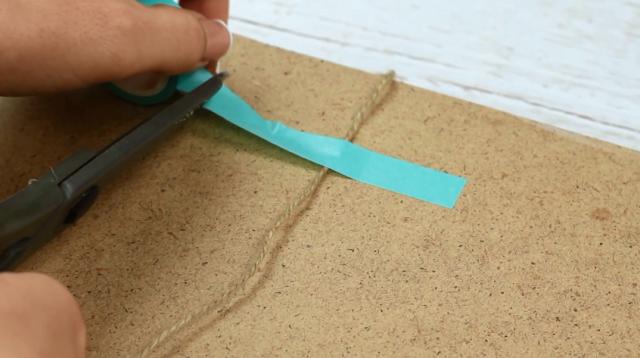
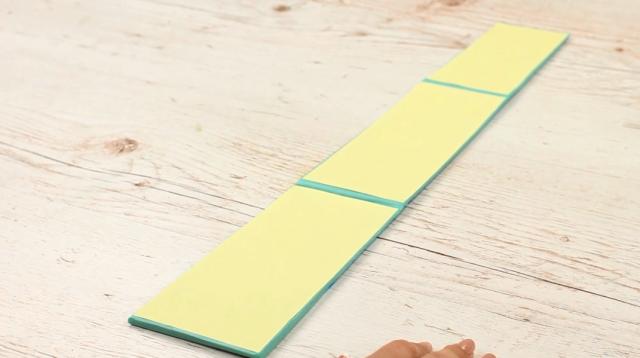
Cut down the slit. Decorate it with the color tape to make it neat.
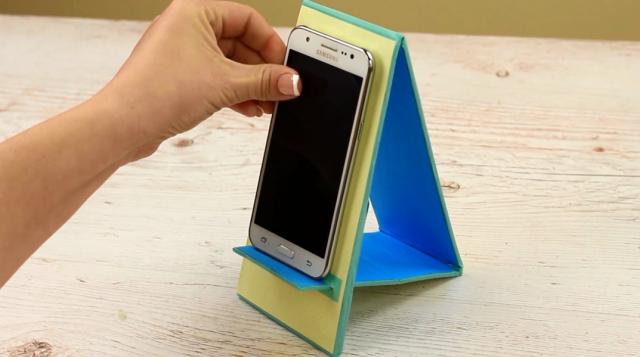
Assemble the holder and place your phone on.
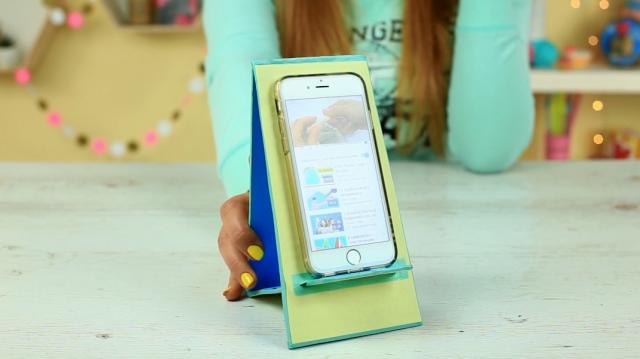
It won’t take you much time to make the smart phone holder. Watch us with style.
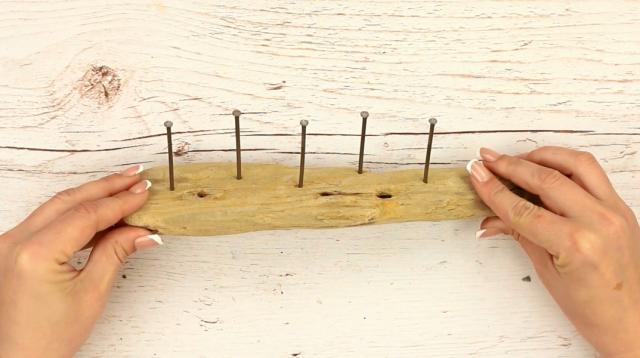
It seems fish is the hero of the day. Let’s make a school of fish to keep your photos and notes.
Hammer big nails in a long piece of wood.
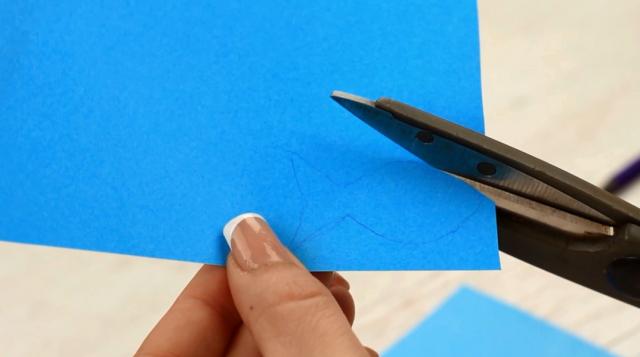
Make little fish from color paper. Draw a simple shape.
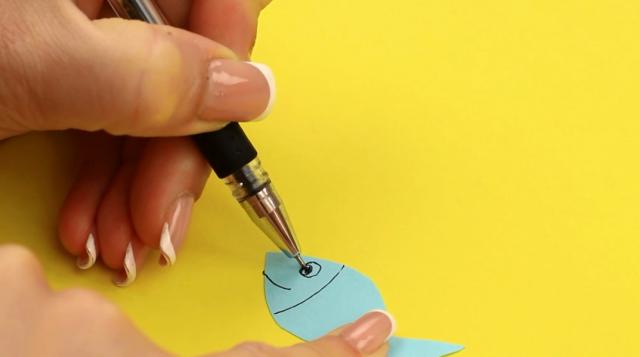
Use the first fish as a template. Add some details.
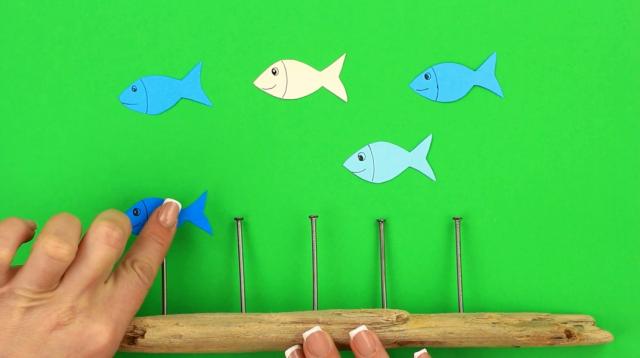
Hot glue the sea creatures to the nails.

Perfect!
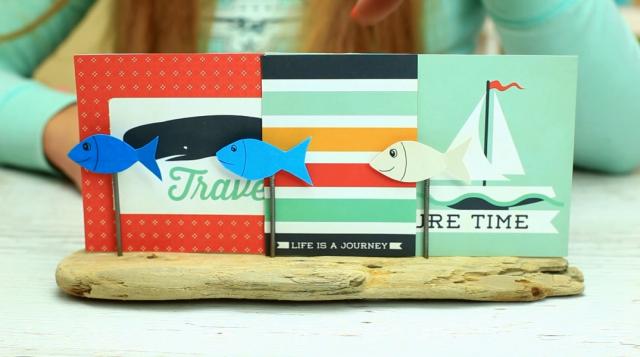
The pretty little fish would keep tight your photos or notes to avoid their scattering around.
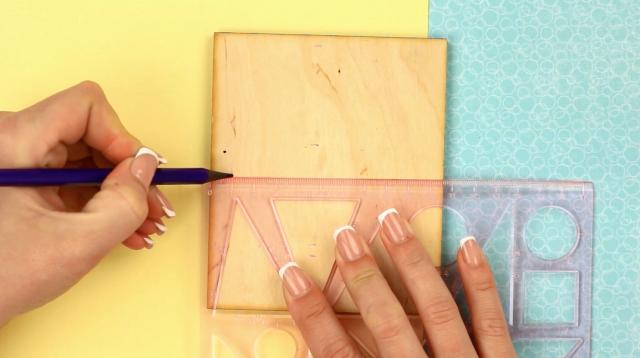
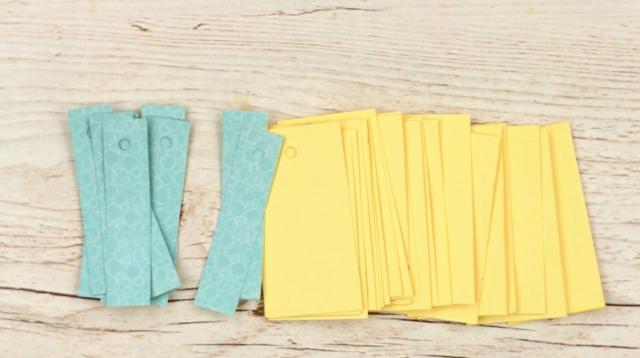
Do you count the days until your holiday? Then you definitely need a calendar.
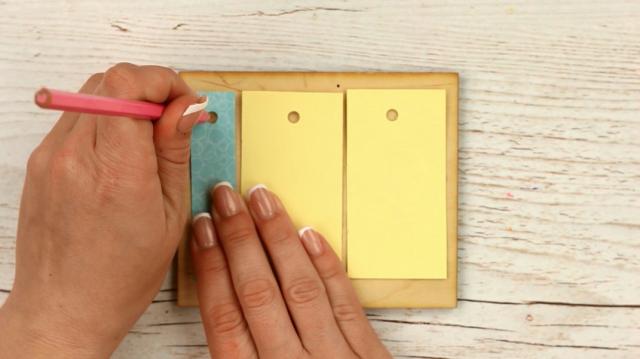
Mark off a wooden board. We’ll cut out the calendar pages of the measured size. We’ll begin with a thin strip for a month, then two same ones for the date. Keep in mind a ¼ inch interval between the pages and beyond the edges.
Turn the board to mark the page length.
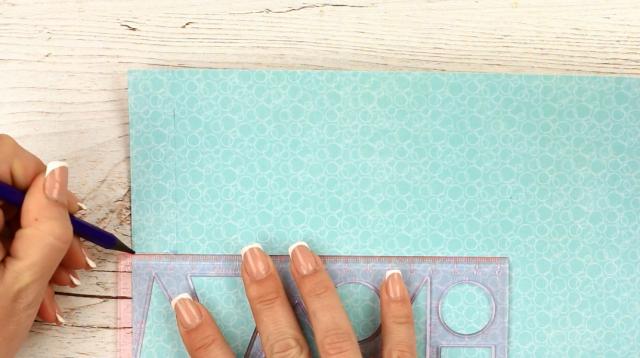
Make the color strips of the sizes you’ve measured out.
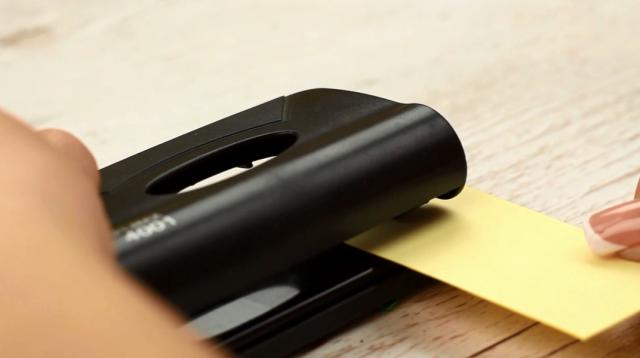
Punch a hole in each page.
Prepare the needed number of the elements.
Mark the hook points.
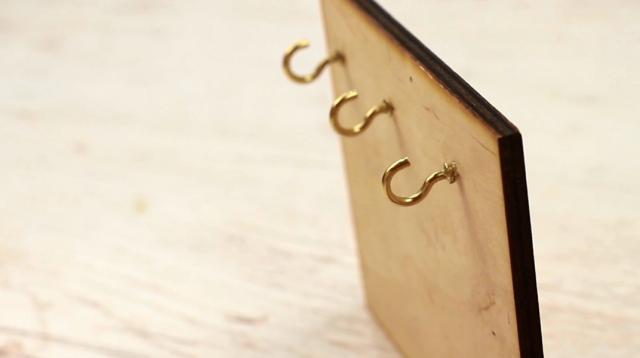
Make a small hole with the nail. Screw in the hook.
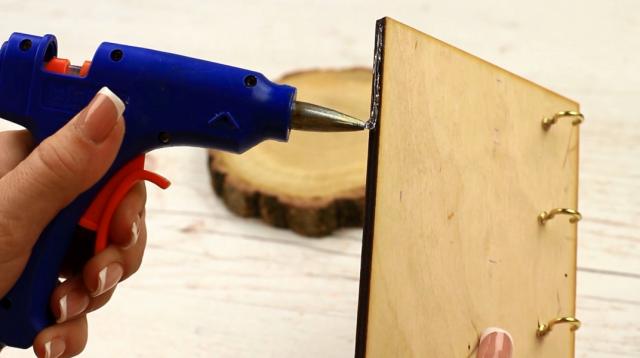
Hot glue the board to the wooden stand.
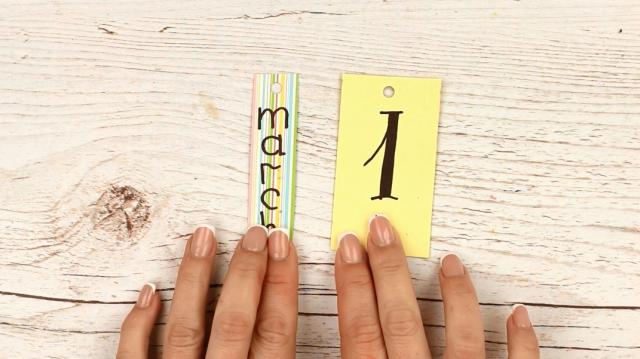
Write down the date and month.
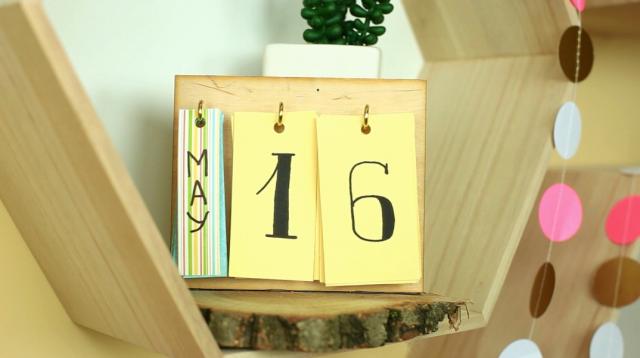
The calendar is ready. You can use it.
It’s a universal calendar, you don’t have to change it. Just turn over the pages, that’s all.
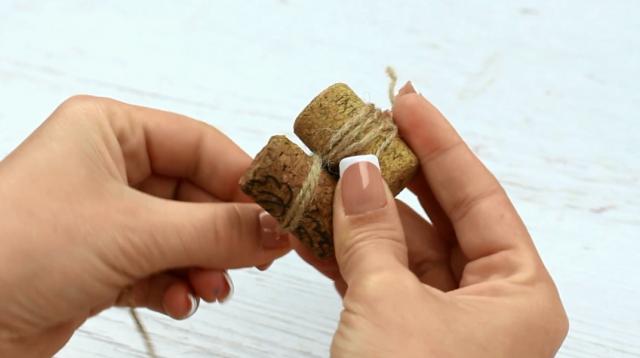
Do you like sailing ships? Make you own mini ship to keep it at home.
Wrap twine around a cork. Add another cork.
Wrap it around. Then join it to the first one. Tie a knot.
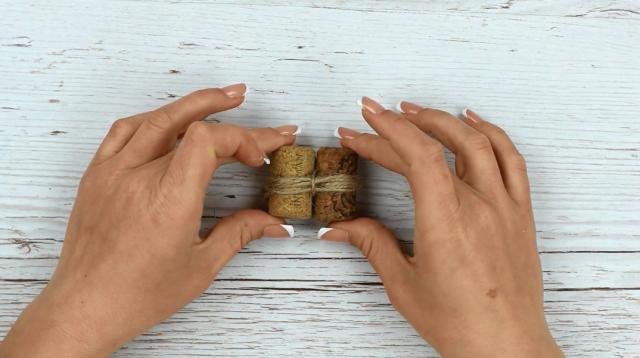
We’ve made a little raft.
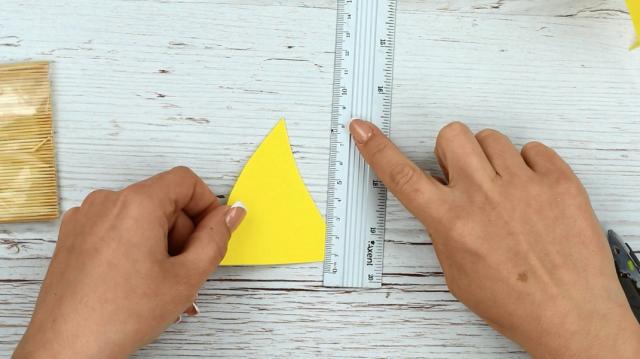
Take thick yellow paper to make a triangular sail.
The height is about 3 inches.
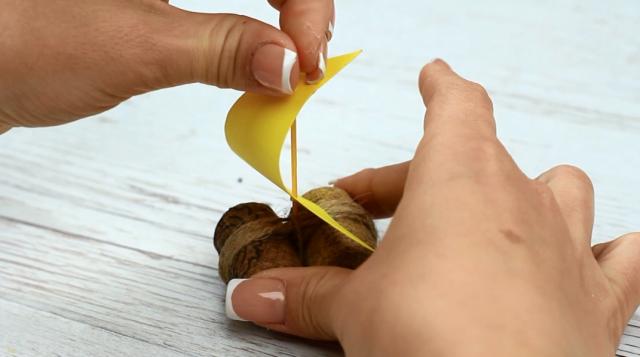
Use a toothpick as a mast. Fasten between the corks.
The cute tiny ship is ready to sail.
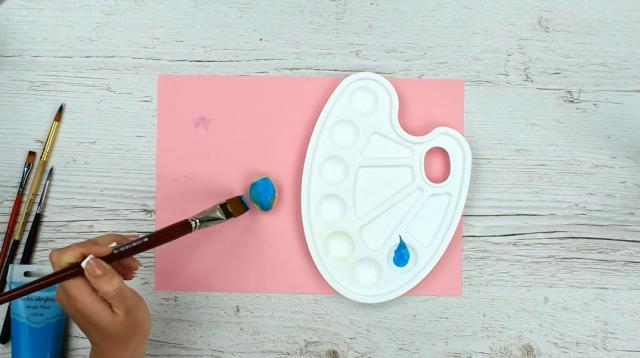
Prepare a big glass container to make the sea. Paint the pebbles blue. To avoid smudging the paint, apply it to the stone lying on the table.
When dry, turn it over and paint the underside.
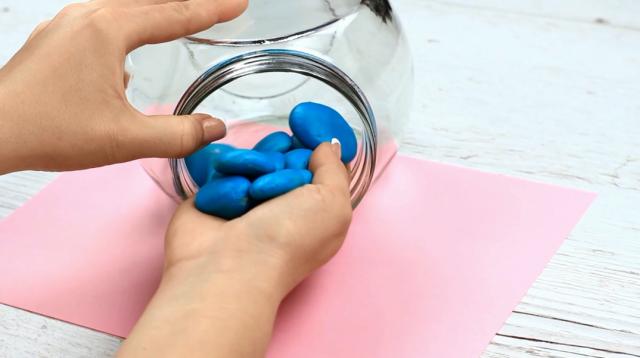
Place the pebbles in the container.
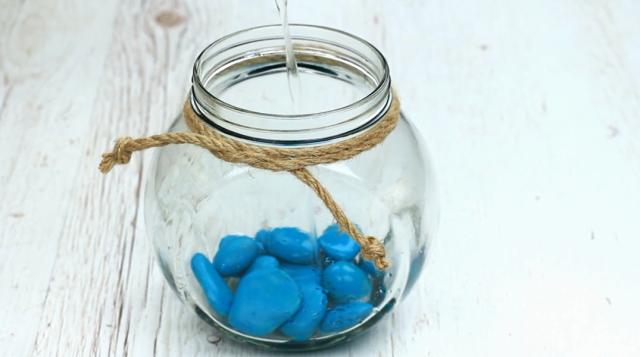
Decorate it with the twine. Pour in some water.
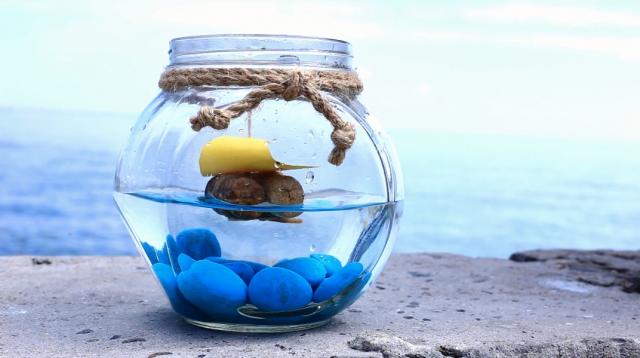
Now you can set sail the ship and have your own mini vessel decorating your room.
The paper boat garland will bring the summer feeling to your room. Besides it’s a great fun to make it, especially if you’re a paper craft lover.
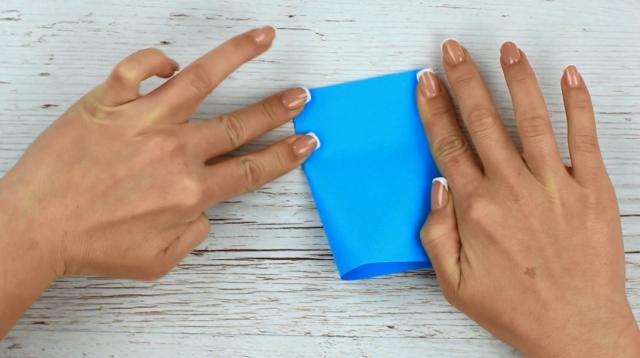
It consists of traditional easy to make paper ships. Take thick color paper and fold it in half.
Find the center. Fold it in half again creasing the top.
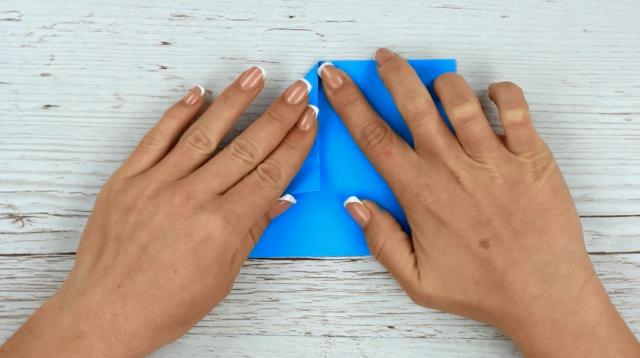
Unfold. Turn the top corner down and to the center. Keep in mind the middle of the top.
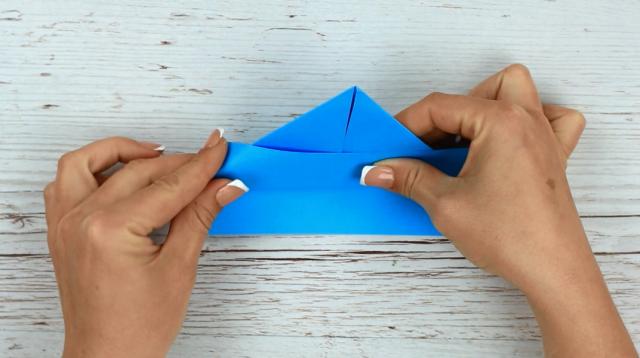
Repeat for the opposite top corner.
Fold the bottom upwards. Fold the corners down.
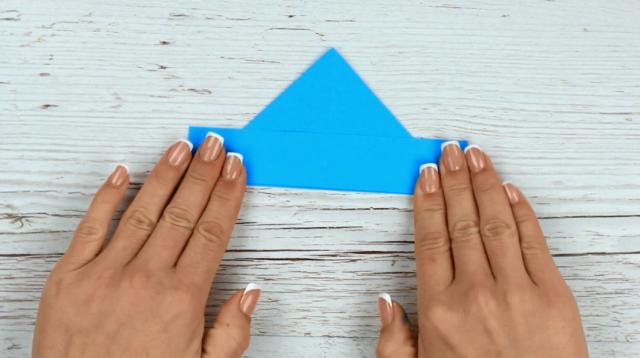
Turn it over and repeat.
Open it and fold the middle of the sides to shape a square.
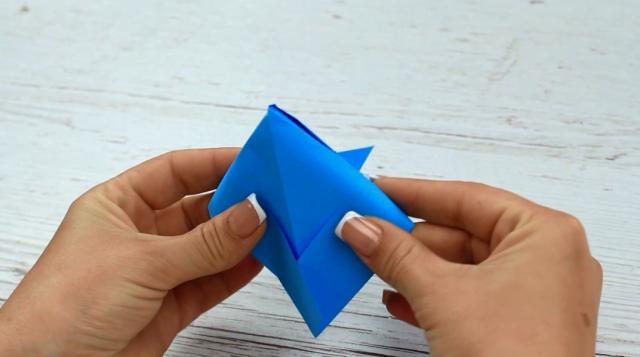
Fold the bottom corner upwards. Don’t reach the top.

Turn it over and repeat.
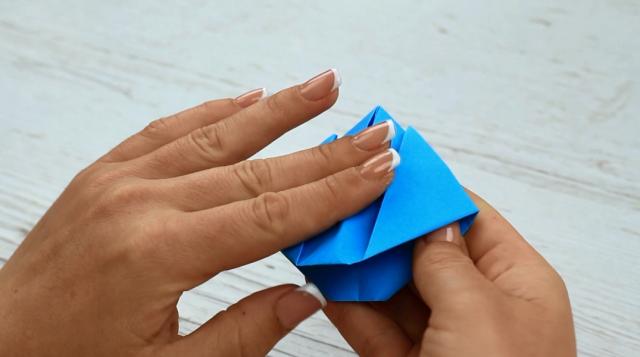
Open again to fold the middle of the sides.
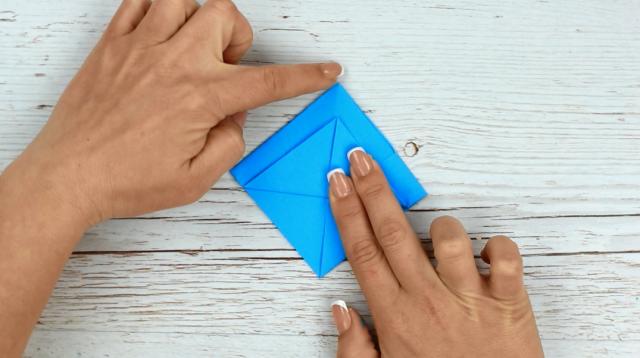
Fold the bottom up. Repeat for the back.

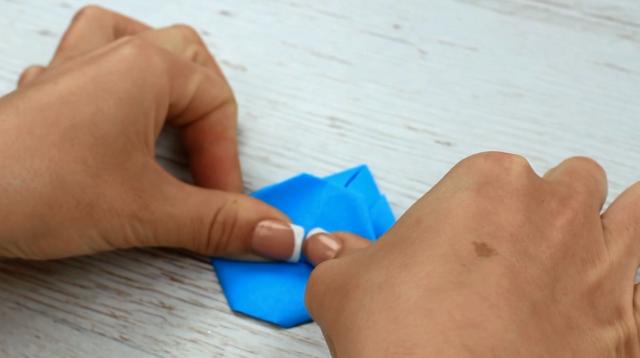
Open the side flaps to shape a boat.
We’ve prepared a number of ships of blue, white, and different shades of yellow paper. We’ll fasten them with the twine.
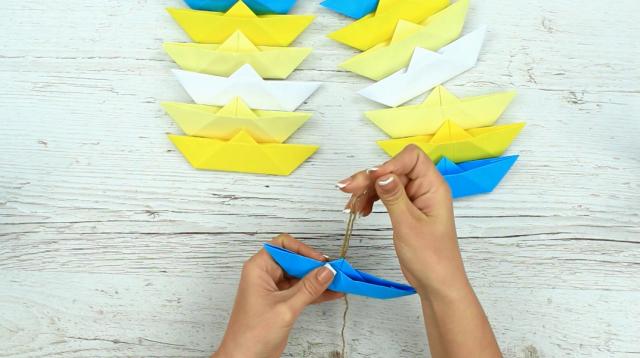
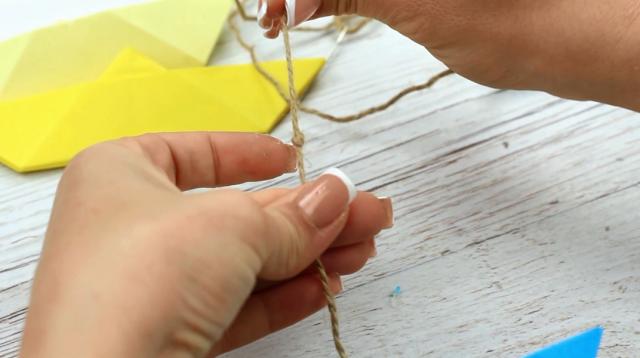
We can hardly thread it.
Use the lifehack we’ve tested. Apply some hot glue to the frayed end. Press down with your finger.
Try to thread it now. Perfect! Pass it through the boat.
Fasten with a knot. Tie a knot on top to fasten the upper ship.
Continue adding the details.
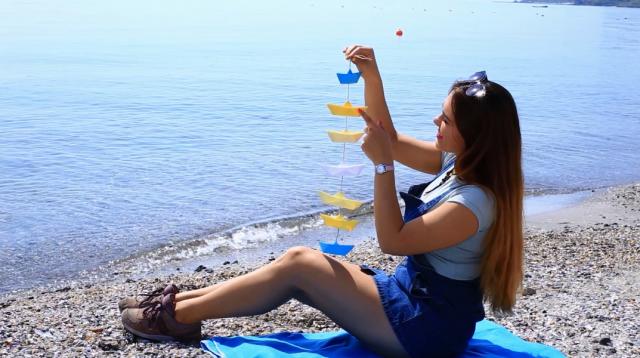
Wow! Cool! The light paper garland will sway slowly as you pass by like the sailing ships drifting in the gentle breeze.
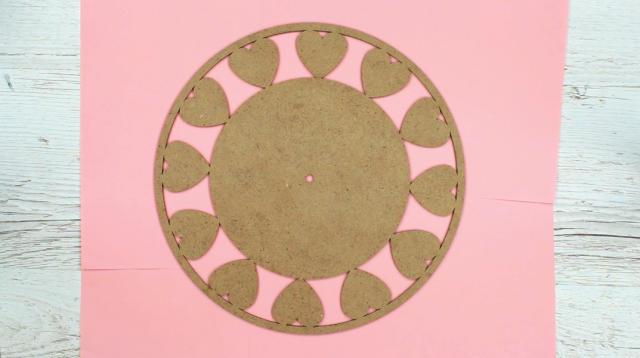
Have you got beautiful shells? Then make a nautical wall clock.
We’ll need a clock base with a hole in the center. Choose the shape at your taste. We’ve chosen the round base with the cut hearts around the edge.
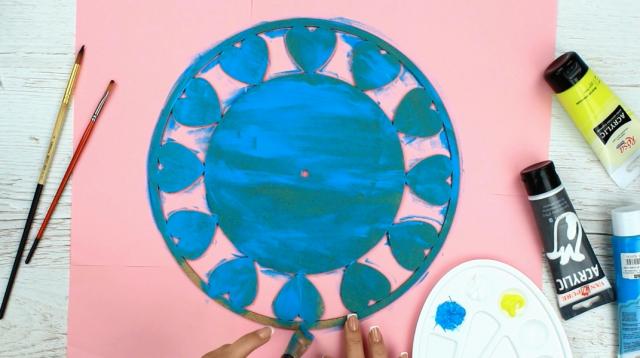
Cover it with the blue background.

Add white strokes to imitate the waves.
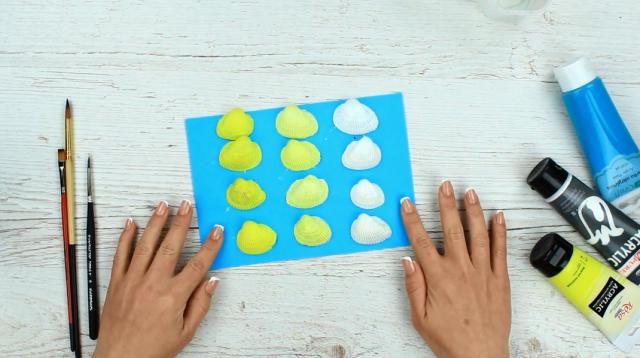
Prepare the shell embellishments. Cover them with the acrylic paints.
We’ve split the shells into three parts to create the ombre effect – the blending from white, moving light yellow shade to bright sunny yellow.
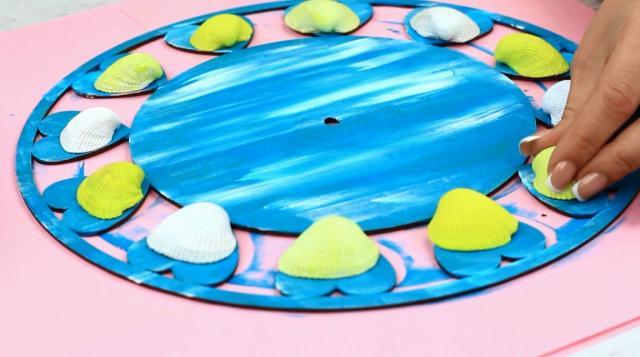
Place the shells on the hearts.
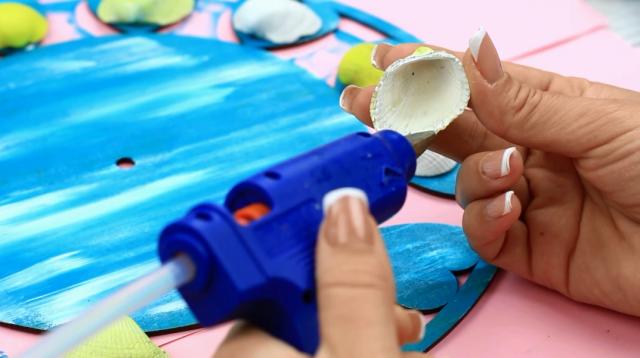
Hot glue.
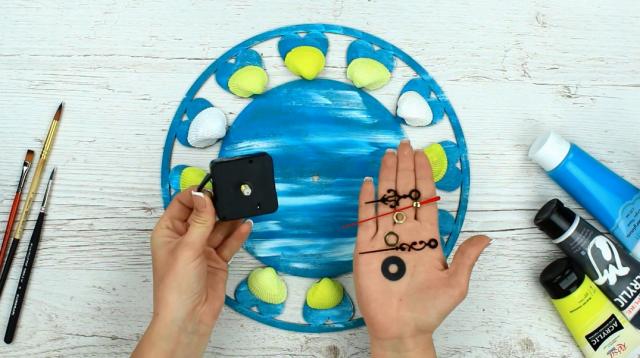
Add the clockwork and hands.
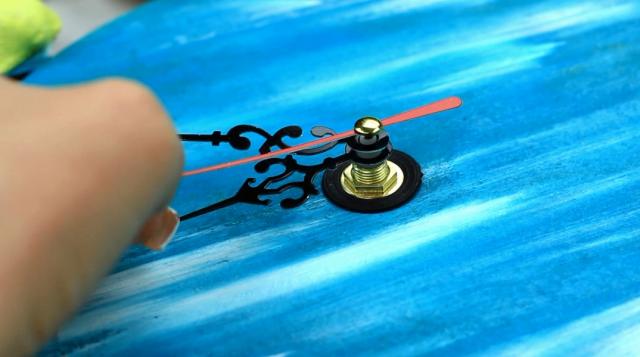
Put it in the central hole. Fix it up. Put on the hands.
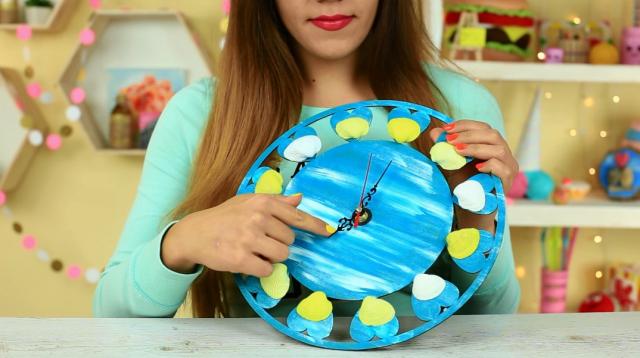
Set the time and hang the clock on the wall.
We’ve shown a quick and easy way to change the interior style. Add bright colors to feel the summer.
Materials we used for this project:
- Wooden frame
- Pebbles
- Brass hooks
- Twine
- Acrylic paints
- Brushes
- Hot glue gun
- Wall clock base
- Shells
- Clockwork
- Piece of wood
- Big nails
- Hammer
- Color paper
- Pencil
- Scissors
- Wooden board and stand
- Ruler
- Screw hooks
- Two corks
- Toothpick
- Glass container
- Water
- Needle
- Cardstock
- Color adhesive tape
- White glue
- Craft knife
If you're like this project, check out our youtube channel: TroomTroom